You can download the 3D models on Thingiverse.
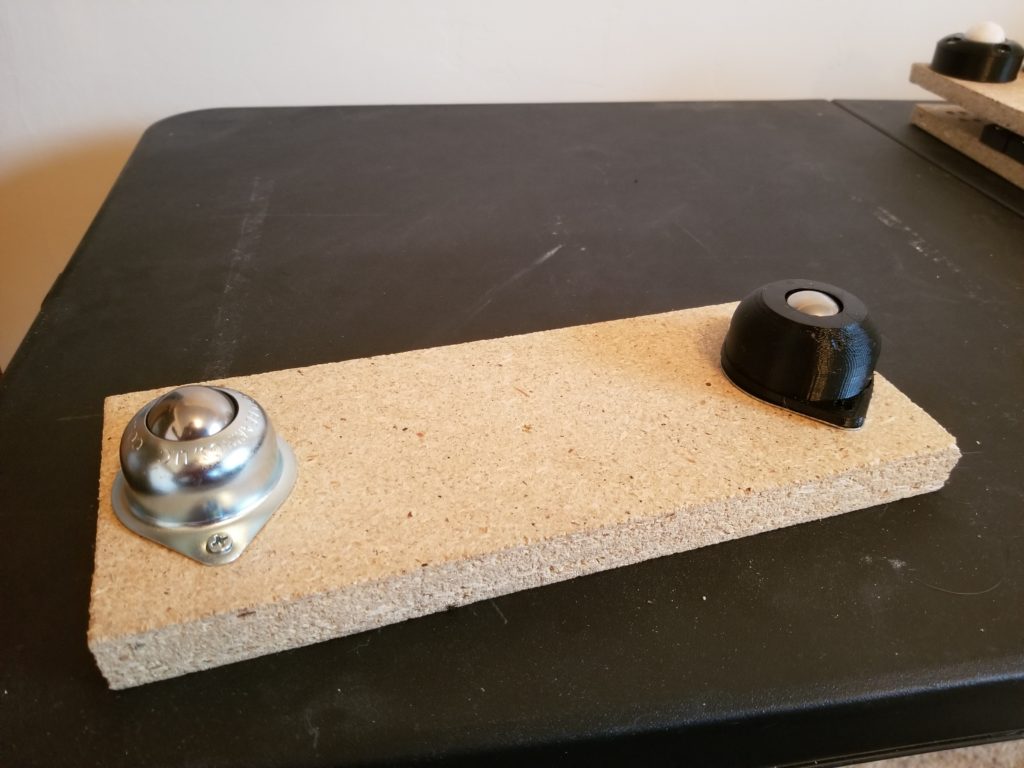
You can buy ball transfers from McMaster-Carr for around $3, so a while ago, last year sometime, I bought some. The ones I bought were pretty noisy. They were so noisy that I couldn’t use them for what I was working on. At the time I thought I could try to make my own, but I didn’t want to spend the time to do so. But 3 weeks ago I decided to try to make my own.
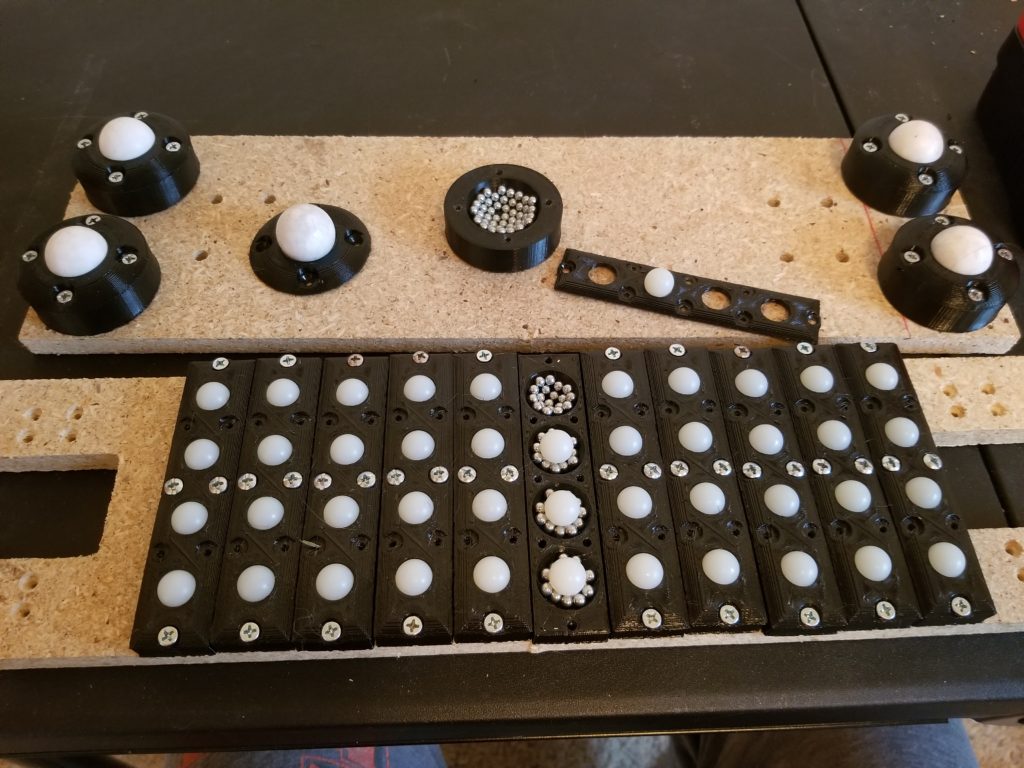
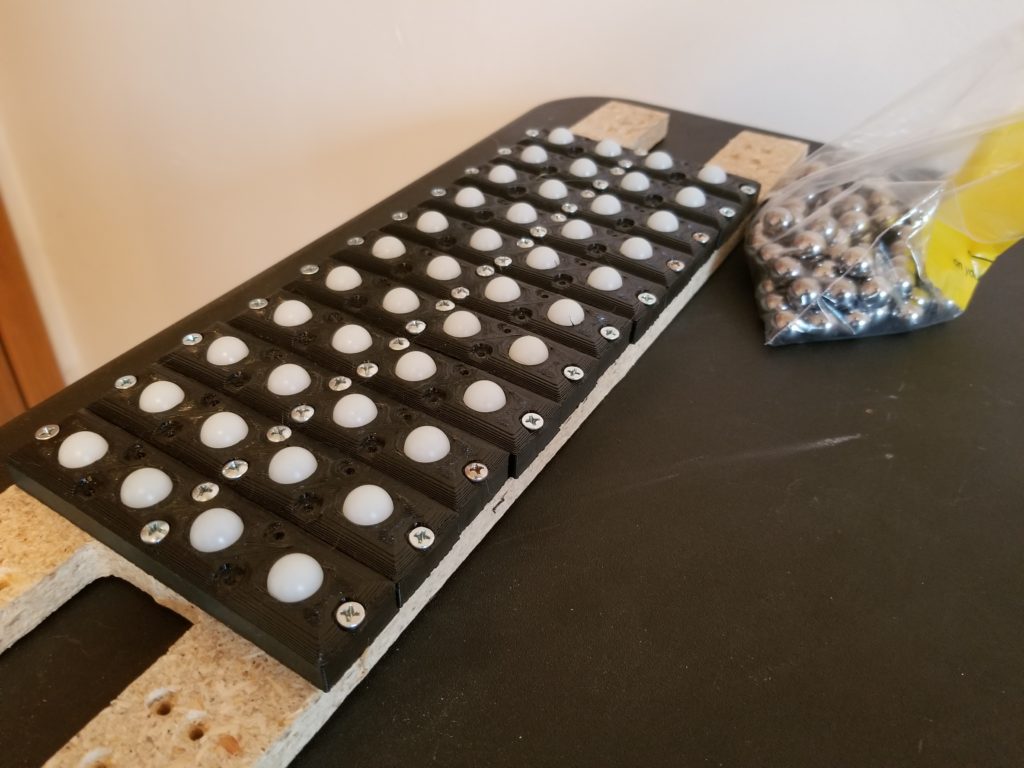
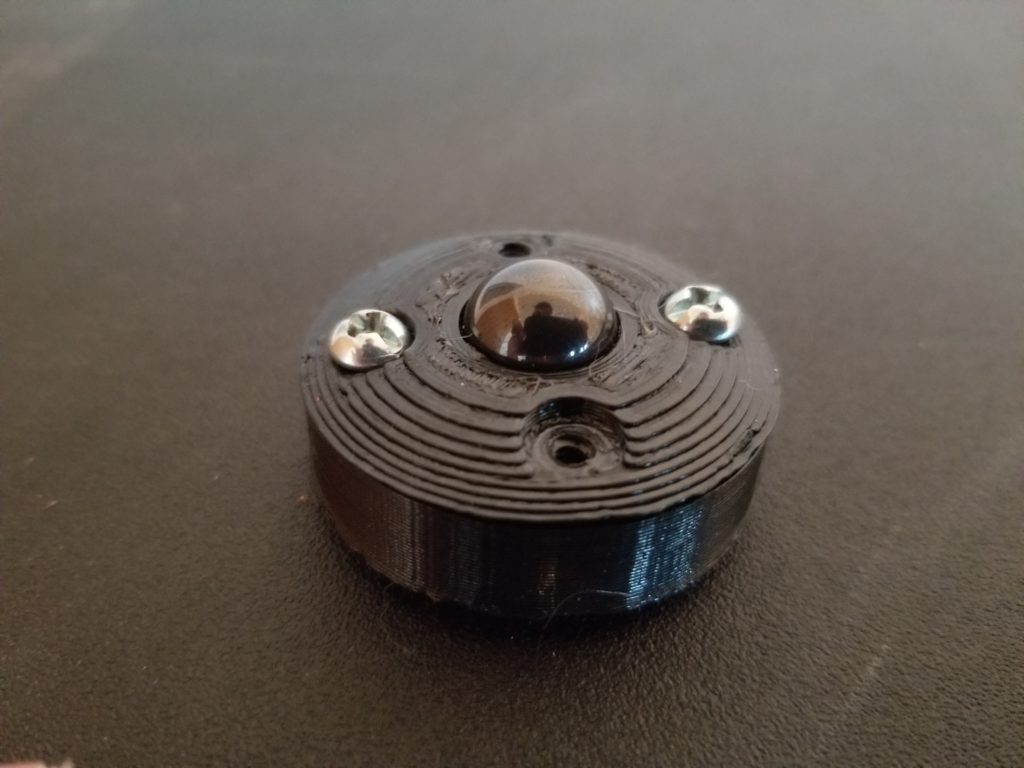
Ball transfers have one large sphere that supported by a number of small ball bearings. For my designs, I bought the large spheres from McMaster-Carr. The small ball bearings I used are just 4.5mm BBs.
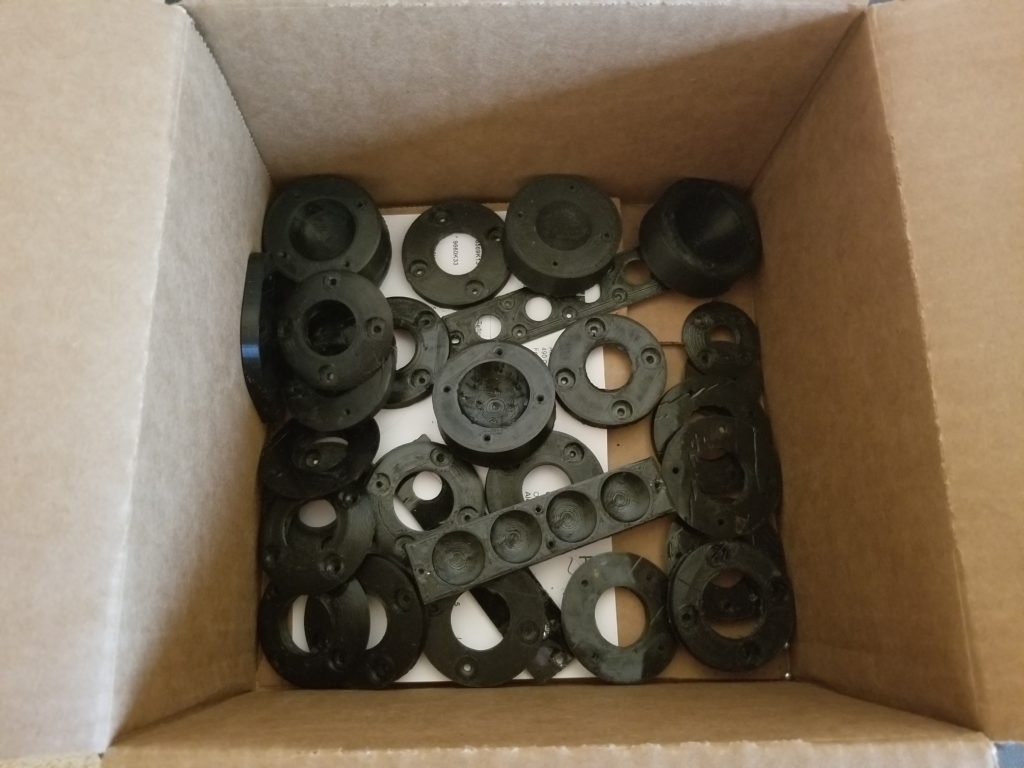
Designs I Ended Up Not Using
The designs in this section I ended up not using because other designs worked out better.
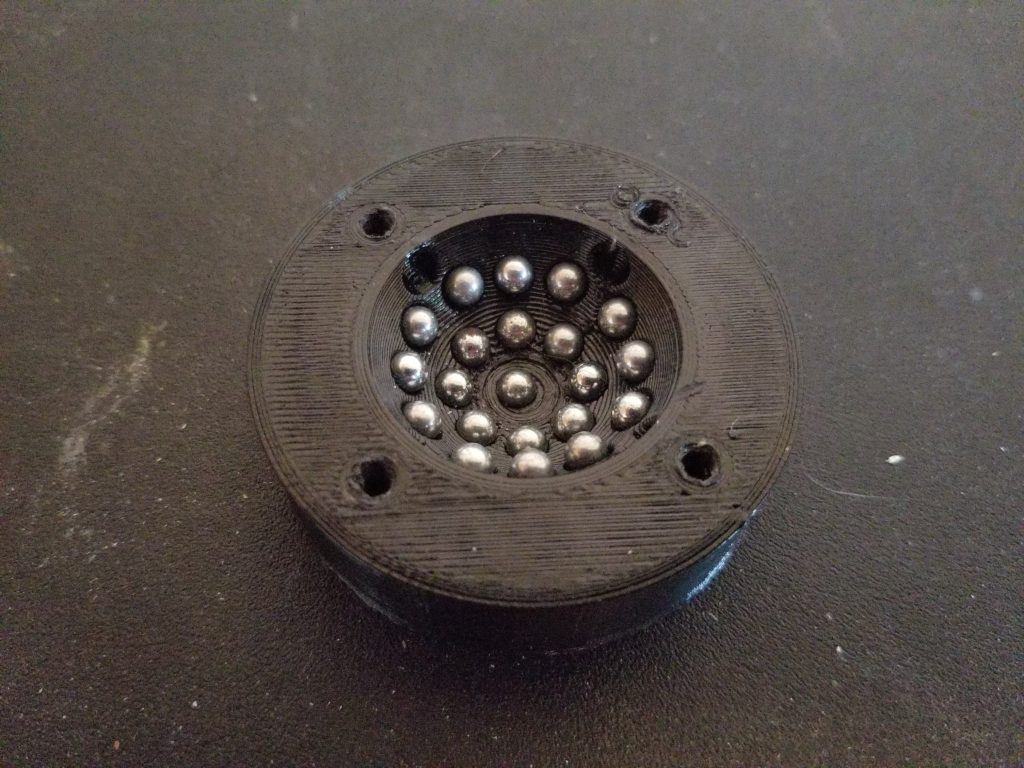
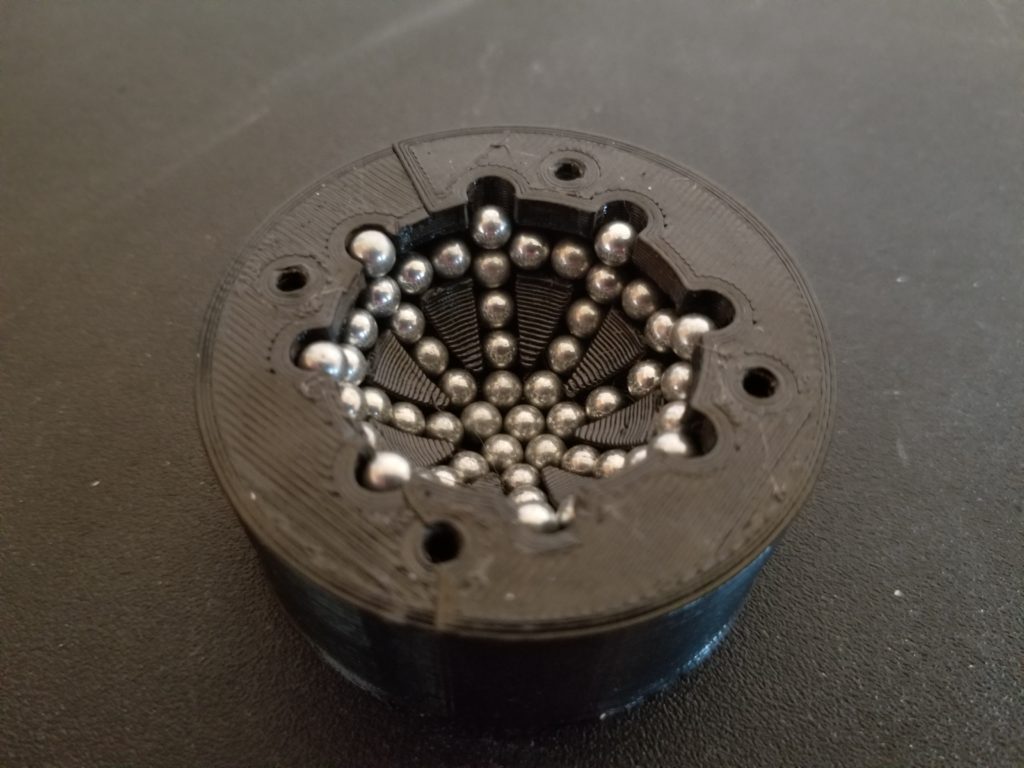
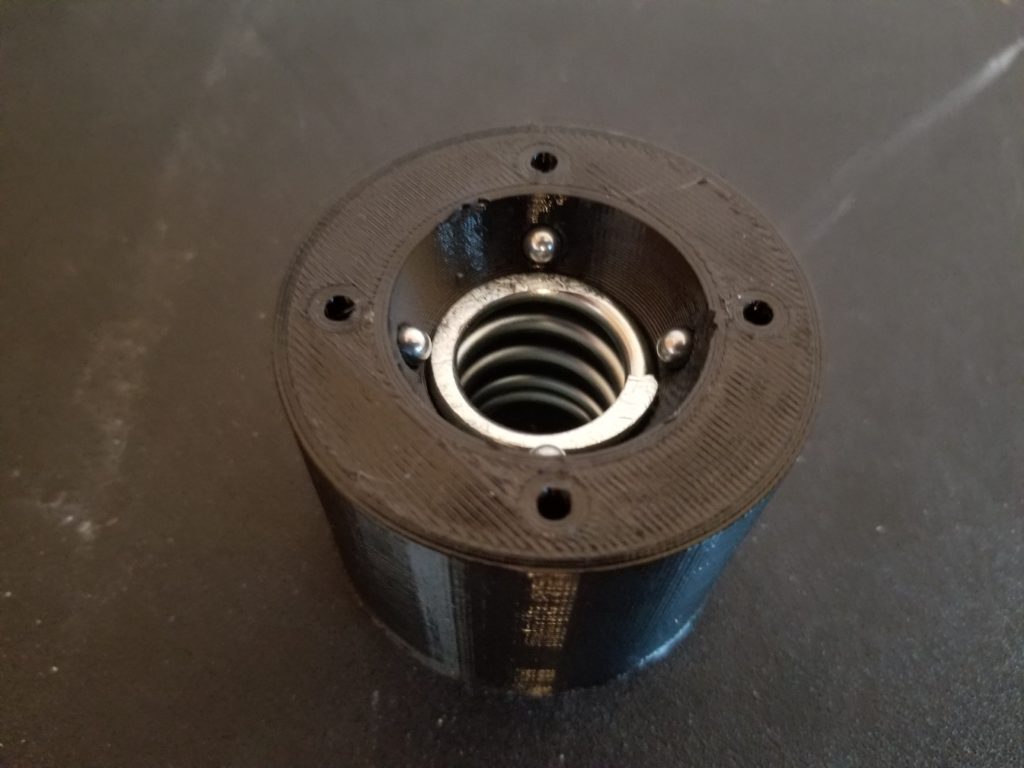
I tried some other variations of the designs above. I experimented with making the hole that the bearings and sphere sit in a little bigger, or a little smaller. For the caps that go over the sphere, I experimented with different sizes for the hole that the sphere goes through. I even tried adding grease to the ball bearings and making the hole in the cap small enough so that the grease wouldn’t come out, but the sphere could still role. I ended up not moving forward with that idea because the smaller hole caused too much friction when it rubbed against the sphere.
Designs That Worked Well
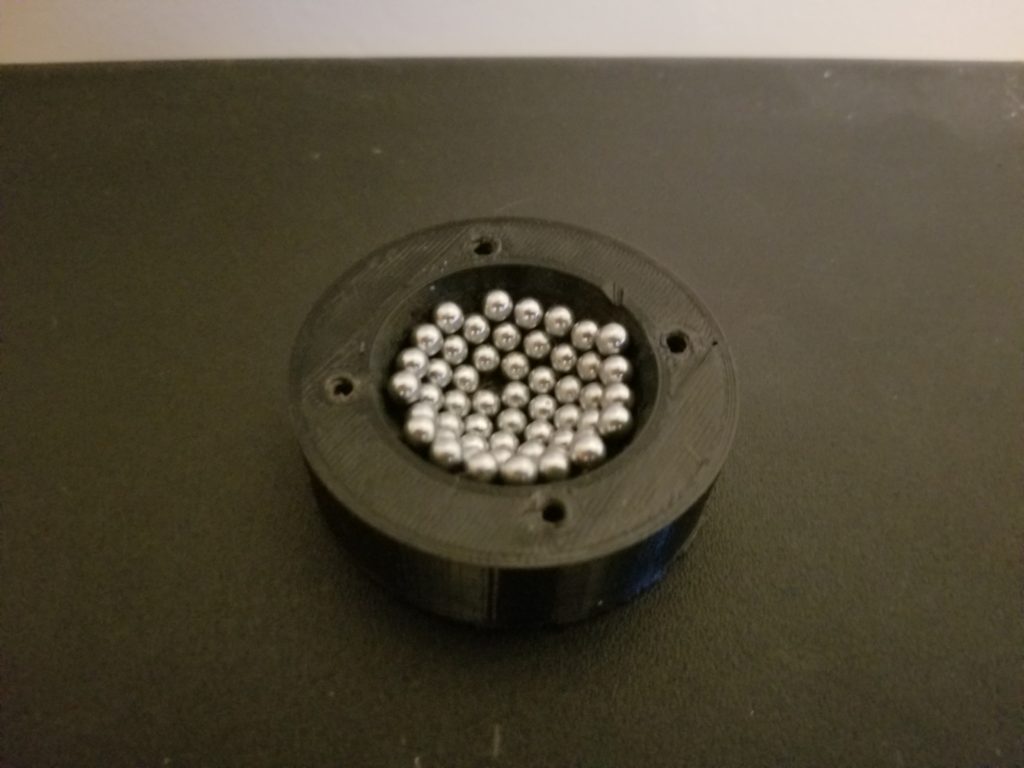
As you can see, just filling the hole with ball bearings worked out the best. No grooves or pockets needed.
Materials
I ended up looking at several different materials to use for the ball bearings and spheres. I tried out steel, nylon, ptfe (teflon), and silicon nitride.

- steel balls. I used the low carbon ones.
- ptfe balls
- nylon balls
- silicon nitride balls
I ended up not doing any testing with the silicon nitride balls . They seemed like they would work well, but they’re just too expensive for what I want to use these for. I bought 2 of them just because I was curious.
Testing
I wanted to see if the ball transfers I made could handle moving around my own weight. I found some scrap pieces of wood and screwed the ball transfers to them and basically made a skateboard with ball transfer units instead of wheels. I then found a large, flat piece of wood and laid it on the floor, put my skateboard on it, then tried to push myself along. I tried the different designs and different materials and narrowed them down just by how much friction I felt when trying to push and pull the skateboard and by how noisy they were.
Through how they felt, I narrowed down the designs and materials I liked. I found that the 1″ ptfe balls felt like they had less friction and where not as noisy as the 1″ steel balls. The 0.5″ nylon balls seemed to have about the same amount of friction as the 0.5″ steel balls, but the nylon ones were less noisy. I didn’t order any 0.5″ ptfe balls because they’re too expensive, but I imagine they would work better than both steel and nylon.
Eventually, I bought a luggage scale and did some testing.
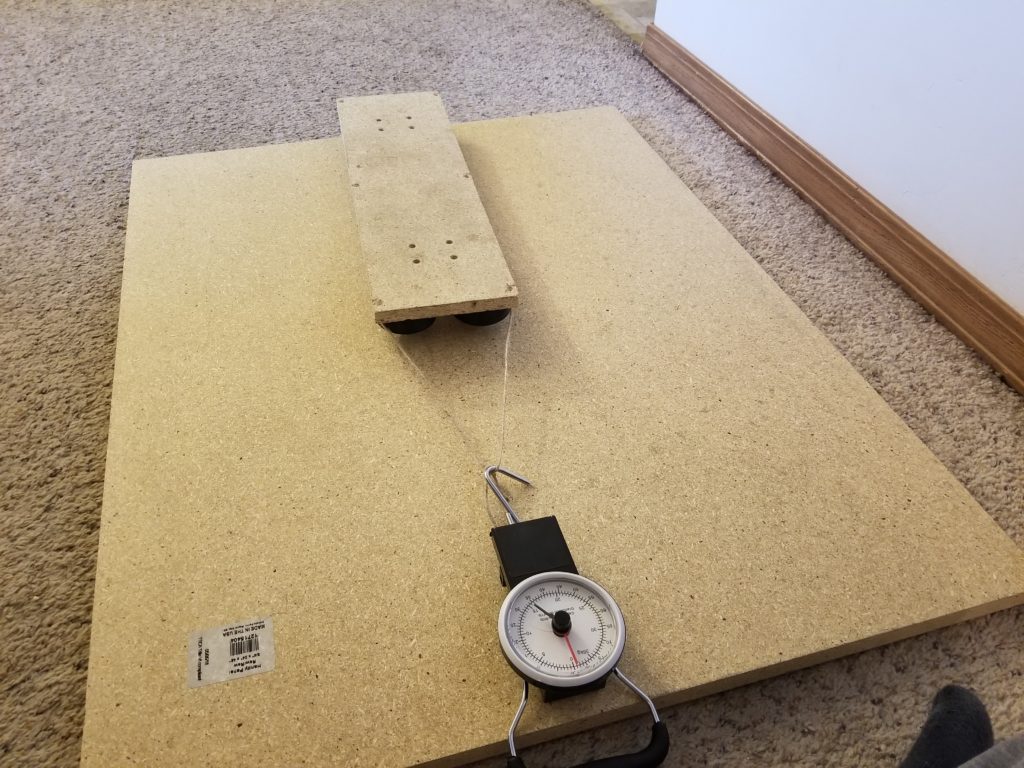
Shown in the above image is the skateboard I made that has the 1″ sphere design I liked. The spheres I used i this test were made of ptfe. I stood on the skateboard while my wife pulled on the scale until I moved forward. I found that it took about 20 pounds to get me going. After I started moving, it took about 5 pounds to keep me moving.
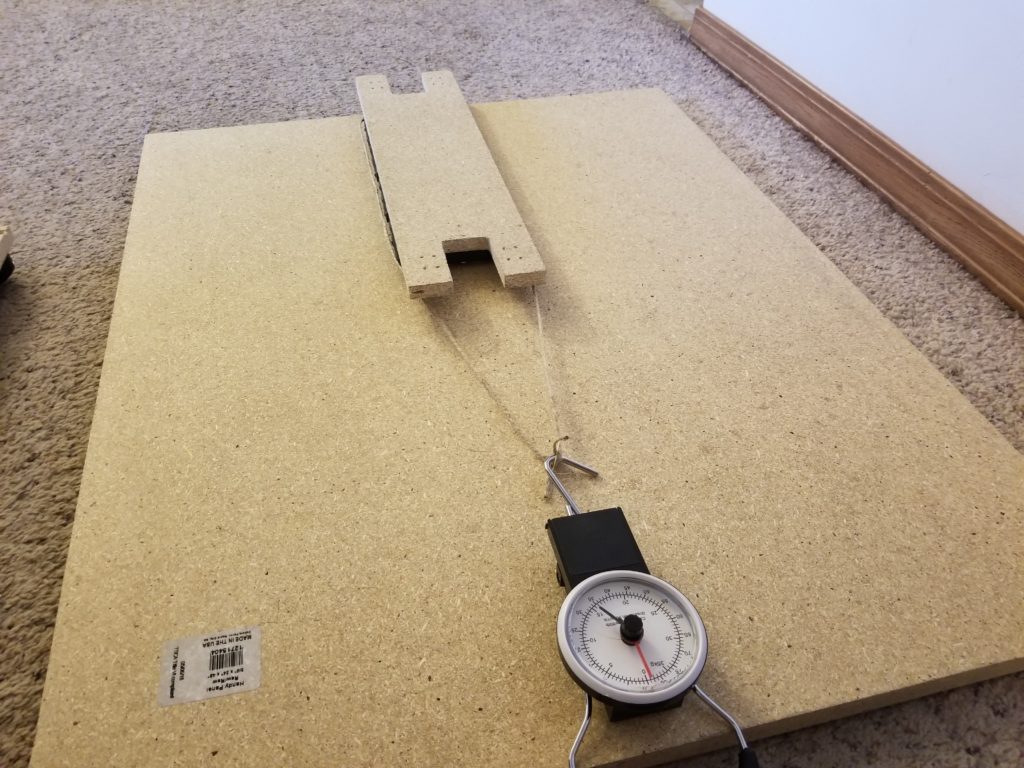
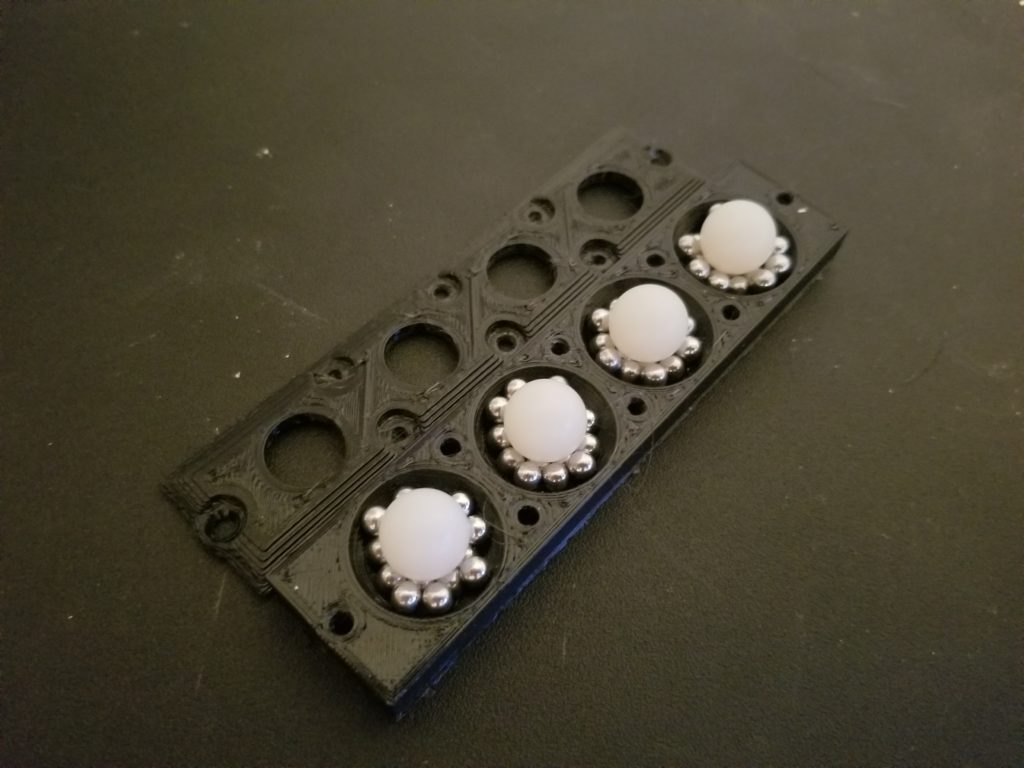
Shown in the above image is the skateboard that has the 0.5″ sphere design. I used 11 of them, so 44 0.5″ spheres in total. The spheres were made of nylon. It ended up taking about 15 pounds before I would start moving. After I started moving, it took about 5 pounds to keep me moving.

I could only find 2 of the ball transfers I bought last year from McMaster-Carr. With these, it took 15 pounds to start pulling me. But after the initial 15 pounds it was much easier to keep me going than with my designs. These ball transfers are only suppose to handle a max load of 70 pounds, and I weigh 160 pounds, so I’m sure that these would work much better if I used 4 or 5 of them.
Conclusion
I found ptfe to be the best material to use for the 1″ spheres. I’d like to use it for the 0.5″ spheres and the ball bearings too, but at those sizes they’re just too expensive. I found that my design that has smaller and more spheres (44 in total) worked better than my other design that had 5 1″ spheres. Both my designs were much quieter than the ball transfers I bought, but the ones I bought had a lot less friction.
Overall I’m happy with my designs. I think I’ll be able to use them in my future projects. In the future, instead of using the 4.5mm steel bbs, I may try to use 6mm plastic airsoft bbs and see how well they work.
Great experiment, I have the same issue as you with the units being too noisy. Do you have the 3d files you drew available for download?
Thanks. Yes I have the designs that worked well available for download here: https://www.thingiverse.com/thing:3562482/files
If you want one of the other designs, let me know and I can check that I still have those and send you a copy.